


The new AVG Anti-Rootkit Beta detects and removes the Mailbot.AZ rootkit. Lets see how we can do it. Download and install the AVG Anti-Rootkit Beta.
Run the AVG Anti-Rootkit Beta, and click "Perform in-depth search". Allow AVG to complete the scan. It will display the hidden Mailbot.AZ rootkit driver. This is shown in the below screenshot.
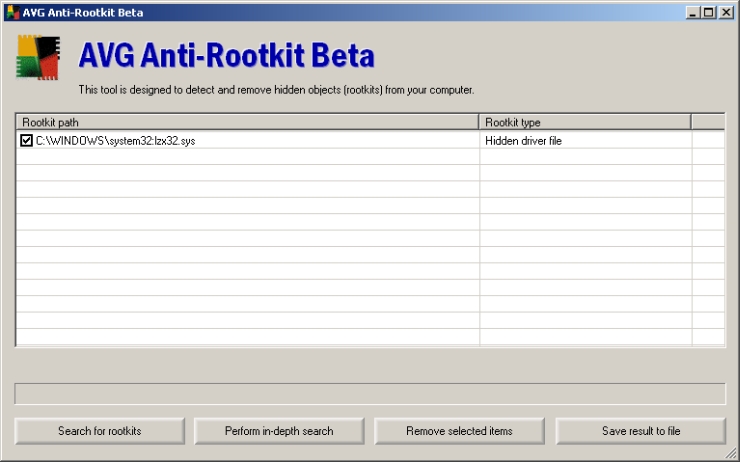
Select the rootkit driver by placing a checkmark against it and click "Remove selected items". Next, agree for the terms and conditions that is displayed by AVG and click "OK" to reboot the PC. An example is shown in the below screenshot.

AVG Anti-Rootkit Beta renames the Mailbot.AZ rootkit driver so that the driver will not be loaded at the next reboot. But, it doesn't remove the actual rootkit ADS and its Registry entries. These can be removed by using ADS Spy (or HijackThis) and RegEdit respectively.
Download ADS Spy, a freeware which can be used to detect and remove ADS in NTFS systems. Run ADS Spy, select the "Full scan (all NTFS drives)" and click "Scan the system for alternate data streams". Once the scan is complete, select the rootkit driver ADS from the scan result, and click "Remove selected streams". An example is shown in the below screenshot.
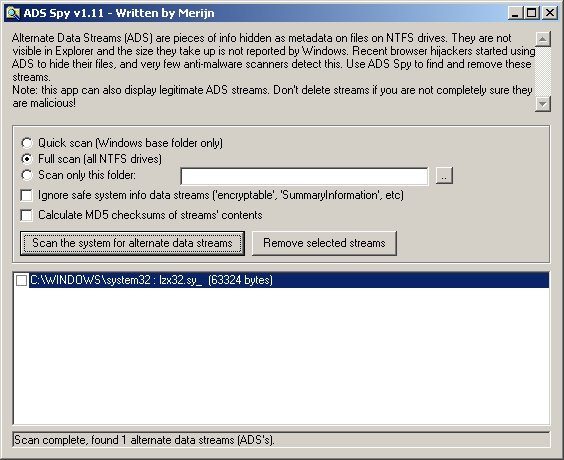
(Note that the driver is renamed to lzx32.sy_)
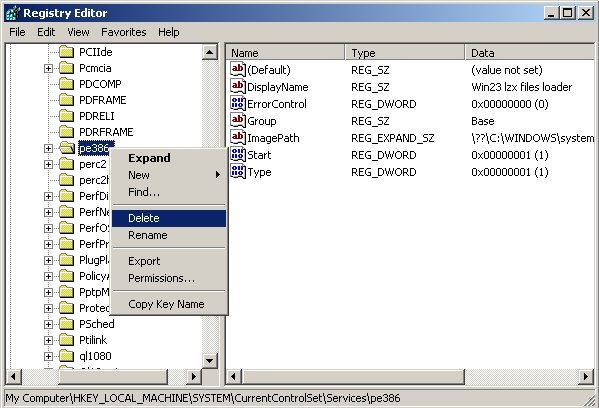
Next, go to Start Menu > Run, and type Regedit and press Enter key. Here, navigate to the key HKEY_LOCAL_MACHINE\SYSTEM\CurrentControlSet\Services\pe386 (or HKEY_LOCAL_MACHINE\SYSTEM\CurrentControlSet\Services\msguard). Right-click on this key (i.e. on pe386 or msguard) and select "Delete". Exit from Registry Editor. This is shown in the below screenshot.


0 comments:
Post a Comment